Small Lettering
Posted: March 31, 2014 Filed under: Education, Embrilliance Software, Embroidery Software, Machine Embroidery Basics, Uncategorized 8 CommentsFirst, when I talk about small lettering – I am referring to letters that are around 1/2″ and smaller that are a satin stitch. As I’ve mentioned in previous posts, satin stitches have the most pull, so when stitched as a small size, there is always a possibility for puckers which is something you want to avoid.
If you are creating the lettering using fonts that are built into the software program, you should have the ability to make stitch property adjustments. When letters are smaller, you want to give the “illusion of fill” without having so many stitches. To do this you want to INCREASE the underlay (this gives color like a basecoat of paint) and DECREASE the density of the top stitches.
In Embrilliance Essentials, this is done by selecting the text for the built in font and clicking on the Stitch tab.
NOTE: Fonts that have been added to the program as BX files may not show a Stitch tab as shown above because they were not digitized with Embrilliance software so there are no stitch properties in the files to adjust.
So, what kind of adjustments do I make for small lettering? FIRST, I set my top finishing stitch density to .6 or .7mm In Embrilliance, the measurements for density are in “points” which is equivalent to a tenth of a millimeter – so as you see in the picture I have selected 7 points.
For the Underlay, I have scooted the running stitch to be closer to the edge. The “edge” meaning where the needle goes into the fabric to create the satin top stitching. If you set the Edge Run to zero, it would be right under the needledowns. You want it to be inset just a bit, but not too much. Mine is set to half a millimeter -yes you may need to adjust this up or down based on the fabric you are stitching on.
Basically, the Edge Run is putting down a perpendicular running stitch that the satin stitches are going to be able to grab onto. It’s an added stabilizing stitch providing a foundation for the decorative top stitching (satins).
The satin underlay normally has a similar stabilizing function and is usually set to be a default of 1.8-2.0 millimeters – a true zigzag looking stitch. However, with small lettering, you want to decrease the distance between the zig zags because you want the threads to add “color” underneath the top satin as well as act as a stabilizing stitch. Since we’ve decreased the top density, there is less to stabilize, so I like to think of this underneath zigzag as more of a basecoat.
The satin underlay provides some “fill and color” and the lighter density top finishing satin provides the shine and more coverage. You have to remember we’re talking about small fonts here. They may not look completely full and satin like on screen, but your stitch out will be so much smoother and flatter that the small lettering will be readable.
Making these changes has nothing to do with changing the stabilizer! You still want to use the appropriate type of stabilizer for the type of fabric you are stitching on.
Until next time – may your bobbins be full!
How to Save a Design in Embrilliance Software
Posted: March 26, 2014 Filed under: Education, Embrilliance Software, Embroidery Software, Machine Embroidery Basics, Uncategorized | Tags: customizing embroidery designs, Embrilliance, Essentials, LisaSewBubbles, Mac Machine Embroidery Software Leave a comment
No matter which Embrilliance program you are using – the free Express mode with BX files, Essentials, AlphaTricks, Density Repair Kit or Enthusiast – its super easy to save the designs you have created. I even show you how to overcome the most common error of “the design doesn’t show up at my machine, why?”
Adding a Basting Box to a Design – why & how
Posted: March 16, 2014 Filed under: Education, Embrilliance Software, Embroidery Software, Machine Embroidery Basics, Projects, Uncategorized | Tags: Basting Box, Bubbles Menagerie, Embrilliance, embroidery software tutorials, embroidery utility, Essentials, how-to, LisaSewBubbles, Mac embroidery software, machine embroidery 6 CommentsI’ve recently joined a few new embroidery groups on Facebook that are machine specific. I’ve found the conversations quite interesting, the projects are just as adorable as ever, and most of the people are looking to their online community for answers, tips and tricks – just like I was back in the 90s! So this blog post is dedicated to all those starting out. Thanks for turning back the clock!
So – the “Basting Box”
What is she talking about – we’re embroidering not sewing! Some machines have a function built into them that will baste a design. What this is, is a long running stitch that can go in a box shape at the border of a design OR around the entire hoop. This will stitch first, before the design stitches. Software programs like Embrilliance Essentials allow you to add a basting box to an existing design. This is handy if your machine doesn’t have this function. If you don’t have software yet – I’ve provided a link here for a 100×100 basting box in the PES format so that you can actually try using one and see if it works for you.
Link to zipped file Zipped_BastingBox_4x4.zip
I’ve found the basting box so useful, that it is part of every single design I stitch and can’t imagine not going to Utility > Basting Box before I send a design to my machine. Here are the reasons why:
- It is a long running stitch that attaches the stabilizer to the fabric. When using adhesive stabilizer it is an extra safeguard against fabric shift.
- If you are using a topping, and I use a topping on every single embroidery design as well, it holds that in place.
- You don’t need to use pins as your extra set of hands in the hoop
- Doesn’t matter what color thread you use – I normally use the first color in the design because I’m lazy. If you want use a thread color that blends into the background fabric, if you are multiple hooping a design and the basting box is covered by stitches or you miss clipping some, it will be less noticeable.
- It takes less time to stitch a basting box than to drag out Peggy’s Stitch Eraser to fix an oops. This goes right along with “measure twice, check it one more time, then make the cut”
In the software….
It would be easier for me to show you how to add the basting box using Embrilliance Essentials, so I created this short video and posted it to my youtube channel. Please feel free to subscribe to LisaSewBubbles on youtube if you would like to have a notice sent to you when other videos have been posted!
If you don’t have software….
If you don’t yet have software I included a link to a 4×4 basting box earlier. What you would do is simply load this to your machine as a design and stitch it first. Then while the hoop is still at the machine, stitch the actual design. It would be just like the following, except you have two designs, not the basting box in the design. Consider the basting box to be color 0 – – – just saved in its own file.
At the machine…
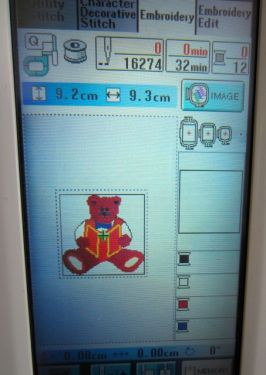
So this is what happens at the machine. I have loaded my design that has been saved with the basting box added (watch the video above if you missed this part). You will see that the first color is the box – I normally stitch this in the same color as color #2, the first actual part of the design.
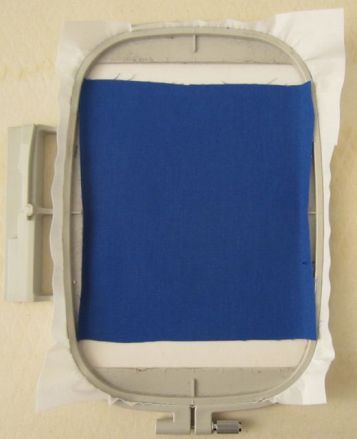
I hoop my stabilizer – adhesive stabilizer or in this case a simple tearaway with Mettler Web Bond sprayed on – and place my fabric in the hoop. If I was “hooping” a child’s t-shirt for example, I would hoop polymesh stabilizer (my favorite for knits), spray, turn the shirt inside out for easier placement in the hoop and tape it, clamp it, pin it out of the way. I normally do not pin to the stabilizer in the hoop simply because I find that with smaller hoops I have to “man handle” the stabilizer too much and that can stretch it or cause shifting…resulting in not so stable foundation.
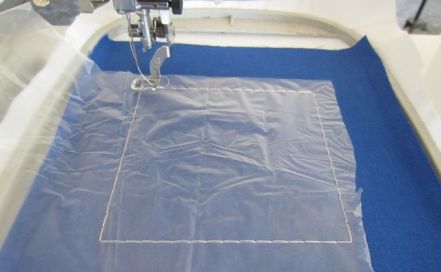
I’m ready to go to the machine – so I attach the hoop and float my water soluable stabilizer on top and stitch color #1 – the box – which attaches all three layers in one step. Nice and stable.
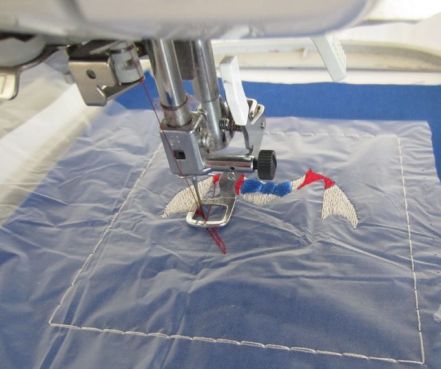
Now I stitch the rest of the design…
I decided to come upstairs and finish the blog post so the design is not yet finished! I will be updating this post with the zip file link in a few minutes.
Once the design is done, I will snip the basting bobbin threads from the back side to remove the basting stitch using my Kai 5100C scissors. Remove the top basting stitch and pull the WSS away from the design. I then take the design out of the hoop and if I had used polymesh or cutaway stabilizer I would use my Kai 5135C curved scissors with the slightly blunted tip to trim the cutaway really close. I normally trim my jump stitches at the machine (using my Kai 5130DC double curved scissors that are super sharp and go over the hoop. If I hadn’t I would trim the jumps BEFORE I removed the washaway on top – simply because if its easier to trim jumps with the WSS there and then it’s cleaner to remove it without the jumps possibly catching on the WSS.
Hope this now makes some sense.
If you are interested in getting more information on Essentials or any of the Embrilliance programs, please click on this link to be taken to their website!

Click Here for information on Essentials and all of the affordable easy to use Embrilliance products!
Happy Stitching!


